شرح استخدام nRF24L01 مع لوحة اردوينو
نبذة:
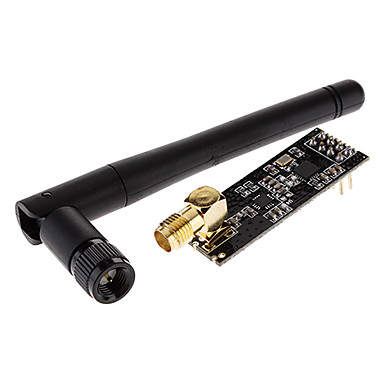
nRF24L01 هي وسيلة رائعة للتواصل لاسلكيا بين لوحات اردينو
قد يصعب علي بعض المبتدئين استخدامها
ولكن سأحاول في هذة التدوينة ان اساعدكم علي استخدام nRF24L01 بسهولة ويسر.
الادوات المطلوبة:
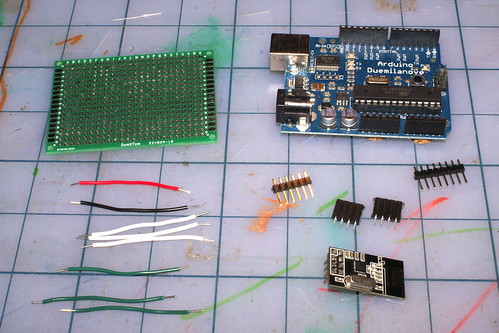
- 2 قطعة من nRF24L01
- 2 لوحة اردوينو
- لوحة تجارب (مزدوجة الوجة)
- Male Header & Female Header
الخطوات:

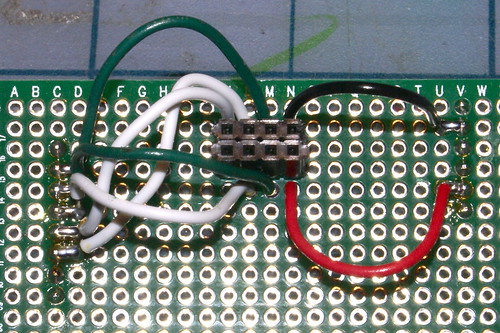
| Line | To Arduino Pin | Radio Pin |
| GND | GND | 1 |
| 3V3 | 3V3 | 2 |
| CE | 9 | 3 |
| CSN | 10 | 4 |
| SCK | 13 | 5 |
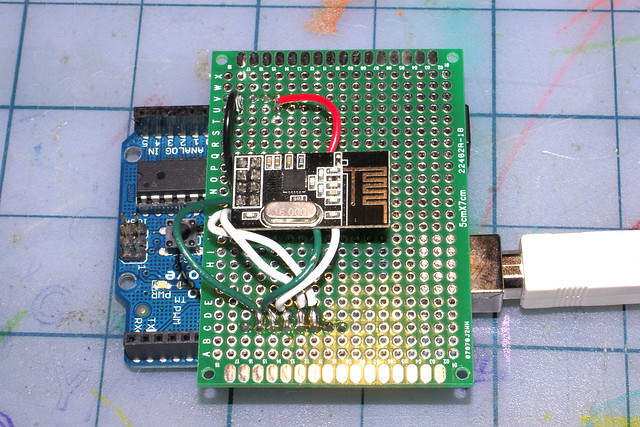
الشكل النهائي:
حمل المكتبة
مكتبة RF24
اذا ظهرت لك رسالة كهذة:
اذاً كل شئ علي ما يرام
في حالة ظهور اصفار بدل القيم الموجودة , اذاً هناك خطا ما
بحيث ان اللوحتين يتواصلوا مع بعضهم
افتح اسكتش "GettingStarted"
File menu >> “Examples” >> “RF24″ >> “GettingStarted”ارفع الـ Sketch علي لوحة اردوينو
/**
 * Example for Getting Started with nRF24L01+ radios.
 *
 * This is an example of how to use the RF24 class.  Write this sketch to two
 * different nodes.  Put one of the nodes into 'transmit' mode by connecting
 * with the serial monitor and sending a 'T'.  The ping node sends the current
 * time to the pong node, which responds by sending the value back.  The ping
 * node can then see how long the whole cycle took.
 */

#include <SPI.h>
#include "nRF24L01.h"
#include "RF24.h"
#include "printf.h"

//
// Hardware configuration
//

// Set up nRF24L01 radio on SPI bus plus pins 9 & 10

RF24 radio(9,10);
افتح شاشة الـ Serial Monitor
واختر السرعة: 57600اذا ظهرت لك رسالة كهذة:
RF24/examples/GettingStarted/
ROLE: Pong back
STATUS   = 0x0e RX_DR=0 TX_DS=0 MAX_RT=0 RX_P_NO=7 TX_FULL=0
RX_ADDR_P0-1  = 0xf0f0f0f0d2 0xf0f0f0f0e1
RX_ADDR_P2-5  = 0xc3 0xc4 0xc5 0xc6
TX_ADDR   = 0xf0f0f0f0d2
RX_PW_P0-6  = 0x08 0x08 0x00 0x00 0x00 0x00
EN_AA   = 0x3f
EN_RXADDR  = 0x03
RF_CH   = 0x4c
RF_SETUP  = 0x07
CONFIG   = 0x0f
DYNPD/FEATURE  = 0x00 0x00
Data Rate  = 1MBPS
Model   = nRF24L01
CRC Length  = 16 bits
PA Power  = PA_HIGH
اذاً كل شئ علي ما يرام
في حالة ظهور اصفار بدل القيم الموجودة , اذاً هناك خطا ما
قم بعمل نسخة اخري من اللوحة
لوحة اردوينو و nRF24L01 و نفس التوصيلبحيث ان اللوحتين يتواصلوا مع بعضهم
شغل اللوحتين
اكتب في شاشة الـ Serial Monitor للوحة الاولي حرف "T" لتبدأ ارسال البيانات
استمتع بالتواصل بين اللوحتين ^_^
Now sending 90...ok...Got response 90, round-trip delay: 28
Now sending 1122...ok...Got response 1122, round-trip delay: 26
Now sending 2152...ok...Got response 2152, round-trip delay: 27
Now sending 3182...ok...Got response 3182, round-trip delay: 29
Now sending 4214...ok...Got response 4214, round-trip delay: 27
Now sending 5244...ok...Got response 5244, round-trip delay: 29
Now sending 6277...ok...Got response 6277, round-trip delay: 26
Now sending 7307...ok...Got response 7307, round-trip delay: 26
Now sending 8337...ok...Got response 8337, round-trip delay: 29
Now sending 9369...ok...Got response 9369, round-trip delay: 27
Now sending 10399...ok...Got response 10399, round-trip delay: 29
Now sending 11431...ok...Got response 11431, round-trip delay: 27
Now sending 12462...ok...Got response 12462, round-trip delay: 28
__
ابدأ من هنا
من هنا تقدر تجرب باقي الامثلة الموجودة في المكتبة التي تغطي تقريبا جميع الوظايف الممكن تنفيذها باستخدام nRF24L01
شرح استخدام شريحة nRF24L01
طريقة توصيل اردينو لاسلكيا Getting Started with nRF24L01+ on Arduino ارسال لاسلكي
المصدر: maniacbug

0 التعليقات :
إرسال تعليق